Lady Melbourne logo

Lady Melbourne has a new home!

You should automatically be redirected to my new site in just a few seconds:
http://www.ladymelbourne.com.au

Showing posts with label Sewing. Show all posts

21.4.10

Kimono sleeves: Lady Melbourne says knowing what fits you makes the world of difference

This is somewhat of a new purchase for me, in that I actually bought the item, brand new. I don't always shop second hand but I realised lately that I don't mention the new clothes that I buy as often as I do my op-shop or vintage finds. I don't normally wear a kimono sleeve but I was attracted by the dramatic print of the dress and of course it is now the most comfortable dress I own.

Sleeves are so key to the fit of a garment and are often overlooked when we are out buying clothes. You've no doubt stood in front of the mirror thinking 'This just doesn't look right!' but not perhaps knowing exactly why.

Sleeves have indicated changing fashion trends for hundreds of years. Before hemline's rose in the 1920's, it had long been scandalous to show a ladies ankle in public, so necklines and sleeves were what was changed to suit fashion trends.

Victorian sleeves courtesy Ageless Patterns


There are plenty of sleeve options, some of the most popular used in every day fashion are:
  • Capped sleeves
  • Short sleeve
  • 3/4 sleeve
  • Long sleeve
  • Puffy sleeve
  • Raglan sleeve

Knowing what suits you and what doesn't can make a huge difference so it's worth identifying different types of sleeves, how they sit on your body and then trying them on. I guarantee when you see the difference between the styles hanging on your frame it will make all the difference to the type of clothes you buy.


Sleeve illustration from Patterns that Fit You


Share/Save/Bookmark

15.4.10

From the archives: A time before Lady Melbourne


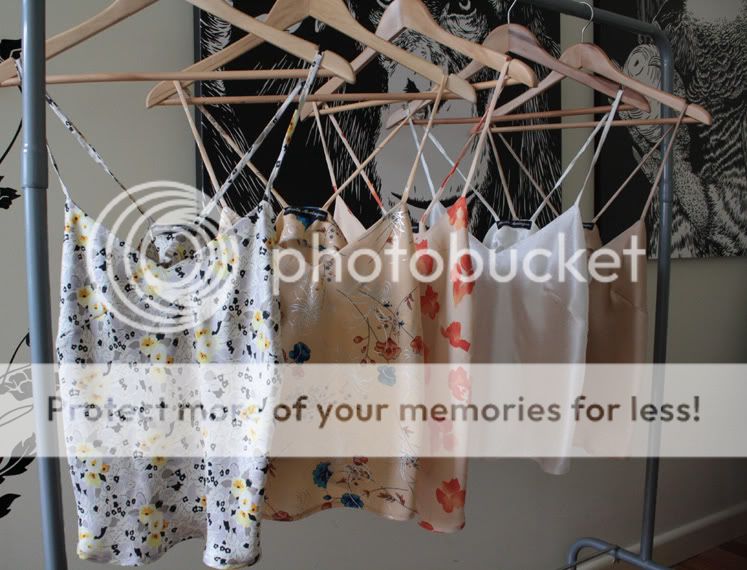
I've been wondering whether or not to sell these camisoles because they are original and one off, but then, they are simply languishing in my studio at the moment so I thought why not put them out there?

Before Lady Melbourne when I had my own accessories label, I dabbled in a couple of ranges of camisoles hand made in Melbourne from vintage fabrics. They sold well, I only ever used the same design but different, beautiful fabrics.

As I still make my own clothes but don't have a label at the moment I thought this might be a nice way to get back into the saddle so to speak because I'd love to start selling clothes again.


p.s- the white one will be for sale, I just didn't like the pictures I took of it :)


Share/Save/Bookmark

30.3.10

A new circle skirt

I made this skirt to wear to fashion week but only wore it once. It ended up being so hot that I completely changed up my outfits every day from what I had planned. I am looking forward to it being a staple in my autumn/winter wardrobe, when I saw the fabric I thought the colour pallet was just perfect for the season ahead.

I've picked up a copy of Peppermint magazine, if you are inclined I've written an article in the current issue on what to look for in second hand and vintage stores when shopping for a wedding. It's the love issue and there are so many sweet things to read!


Share/Save/Bookmark

7.3.10

Dear Lady Melbourne: 1984 called, it wants its shoulder pads back

Right so you know that I'm into D.I.Y don't you? And I am totally into this embellished shoulder trend at the moment, but I think it is just that: a trend. Come 6 months and I will no doubt be seeing the chain store knock off's on the racks at Savers.

So with that in mind, I created my own that I have pinned to my Tina Kalivas tux jacket. This is possibly the EASIEST D.I.Y project I have ever attempted and if it's something you have been considering then I'd urge you to try it. You basically just decorate shoulder pads to your liking. That's it.

I went a little overboard, but as it's fashion week next week I thought why the hell not make something to wear that's a little bit over the top.


Share/Save/Bookmark

12.11.09

Lady Melbourne's DIY circle skirt- complete!


Here it is! The final product and I'm really happy with it. I hope if you have attempted to make it you've had luck as well, it's such a simple skirt to make, particularly as you don't need a pattern.

Don't forget you have until 5pm today to enter the give-away for the $50 EziBuy voucher!

Skirt: Lady Melbourne
Tank: H&M
Cuffs: B&W I made, gold from Bugis St market, Singapore
Bag: Vintage, I inherited it from a great aunt who was a ballroom dancer in her day.
Heels: Table Eight factory outlet, DFO Essendon
Sunnies: Kinki Gerlinki
Earrings: Melbourne Central, basement level.


Share/Save/Bookmark

11.11.09

Sewing: Lady Melbourne's DIY Circle Skirt Part 2

So let's jump straight into finishing the skirt shall we?!

You can see part one here, the absolute finished product will be shot and up tomorrow.

1. Stiffening the waistband.


I'm using Petersham ribbon as the stiffening for my waist band, but it is entirely up to you what you use, and how precisely you make it. There are many ways that this could be done, this is how I've made the skirt.

The width of your waist band is also an individual choice. I've decided to make mine the width of the Petersham ribbon, but you can make it as wide or narrow as you like.

Stiffening length is your waist measurement plus an inch for seam allowance.

Measure double the width of your stiffening plus maybe 1cm for seam allowance, and add 1cm onto each end. Cut.

2. Folding and Ironing

Fold the ends in as seen in picture part 1, and then over the stiffening as seen in part 2. Iron.

3. Pin


Pin to keep in place and set aside.

4. Insert the zip

Iron down a crease/seam on the wrong side(or inside) of your two side seams of the skirt, about 1cm wide as seen in picture.

5. Pin zip


Turn the garment right side out and pin the zip in place, making sure to be as exact as possible. Just under the zipper, mark with a pin where you want the seam to begin/end as seen in the photo marked with an X.

6. Sew Side Seam
Turn the garment inside out and pin the seams together. Take your marker that you placed on the right side out and re-pin to this side so you can see where to stop sewing.
I've marked it in an X in the photo. Sew.

Now turn the garment right side out. This is what it should look like:


7. Sew zip in place

If you have a foot on your machine for a zip function then replace it now and sew. If not it might be easier to hand stitch this part first and then come back and machine later on. You want to sew along the marked dots that I've shown in point number 6.
This is what it should look like finished:
8. Attach waist band


Now that your zip is in place, pin your waist band to the waist of the skirt, right sides together as shown in the picture. If you have miscalculated, now is the time to adjust the waist band if you need to make it shorter. Trust me it's much harder once you've sewn it on!

Sew as I have marked with dots in the picture above.

Now is when I would over-lock all of the raw seams inside the garment, and cut off any loose threads. It's like the clean up part of the job.
If you don't have an over lock stitch you can use the zig-zag stitch, or you can slip-stitch it by hand.

Iron the garment and now all you have to do is the hem.

Circle skirts aren't easy to hem because of the angle they are cut on. I would take a short-cut here and over lock the hem, but if you don't have that luxury then you can use bias binding to help with the hem.

On this skirt I have used the over lock stitch on the raw hem, and then narrowly turned it up and straight stitched.

These two websites have great advice on how to sew bias cut hems.
Sewing.org
Ehow.com

Tomorrow is the finished product in photos!

Again, happy sewing!

LM
x


Share/Save/Bookmark

9.11.09

Sewing: Lady Melbourne's DIY Circle Skirt Part 1


I have had requests for a while on simple sewing tutorials, and what better way to start than with one of the easiest DIY designs, a circle skirt.
Since the 1950's when they first became popular, circle skirts have come in and out of fashion but seem to remain somewhat en vogue due to the simplicity with which they are made.
You don't need a pattern for this, just follow the instructions and you will be wearing a gorgeous self creation in no time.
This is part one, in part two I'll be inserting the zipper and finishing the garment.

You will need:
Materials
1.5 yards of light to medium weight fabric
Sewing thread
A large size snap button or hook and slide.
7" zipper

Tools
Fabric scissors
Pins
Tailor's chalk(optional, you can use pins)
Rulers or measuring Tape
Sewing machine
Measurements
Waist
Length of skirt

1. Your waist measurement is like the circumference of a circle. You will need the radius of that measurement for this exercise. Making sure that you add on an inch or two for the seam allowance, divide your measurement by 3.14, and then by 2. You will then have the radius.
For example, if your waist measurement is 29" you will get a radius of 4.9"

2. Folding
Fold your fabric in half horizontally, and then in half again vertically, as shown in the picture.

3. Create your waist line.
From the corner fold, measure your radius measurement from the center, and then at various points until you get to the edges, or folds of the fabric. You can either use tailors chalk or pins to mark the fabric.

4. Measure the length of the skirt from the beginning of your radius measurement, as seen in the photo below. Make sure you measure around the angle as you did for the waistline so that your hemline is even! In this case, I have measured the length of the skirt as 25" including seam allowance.

5. Cutting
Cut along your measured lines.
5.a As the fabric has been folded twice, don't forget to cut along the fold on one side as seen in the photo below, this will create the side seams.

6. Pattern pieces
You should now have 2 identical pieces cut out as shown below.

7. Sew along the side seam, allowing 1/2" for seam allowance.

8. Pinned at the side, this is what your skirt should now look like.

I'll add my disclaimer here that I have no professional training in pattern making or sewing. Mother Melbourne taught me to dress make when I was a teenager, and since then I have continued to learn from her and teach myself.

If you have anything to add that might be helpful to others, please leave a message in the comments section, I might even update the post if it's useful.

In part two I will be adding the zip and finishing the garment.

Happy sewing!

LM

x


Share/Save/Bookmark

30.10.09

Happy Friday!


Happy Friday everyone, it's really good to be back!

I haven't had a give-away for a couple of weeks but rest assured I have plenty of stuff being sent in so here are a couple of little things that might just make your wardrobe work for you.

The Flexi Flats fit into these cute little pouches that fit in your bag. I'm not one of those girls you will ever see at the end of an evening sans stilettos, but I would be tempted to pop these on. The little pouch folds out into a bag to carry your heels. They've truly thought of everything.

Second up is this cute little undetectaBELT from Sparks and Frankie. I've photographed it over the top of my dress but it is designed to be worn under tight clothing so your belt doesn't show.

I have three lovely packs to give away with both products, all you have to do is leave a comment on this post. Entries close 5th November 5pm AEST.

International visitors welcome!

This is my next little project now that things have settled down somewhat. I found this size 20 dress at Savers and just loved the fabric. I'm pretty sure I'll be able to re-cut it to make the shift dress from this vintage pattern.
Stay tuned!


Share/Save/Bookmark

13.10.09

How to look splendid for next to nix!

This is the post that always escapes me: great idea but never executed.
I was raving to one of my friends today about this fab pure silk top that I bought at DFO for $20 on the weekend and she said for god's sake will I do a post about it!

So here are some of the tips I employ to look splendid on very little cash.

1. Never pay retail. Designer outlets should be your new best friend if they aren't already. The silk top in question is from the Witchery factory outlet and needed a stitch to attach the bow on one side of the collar. I saved $129.95.


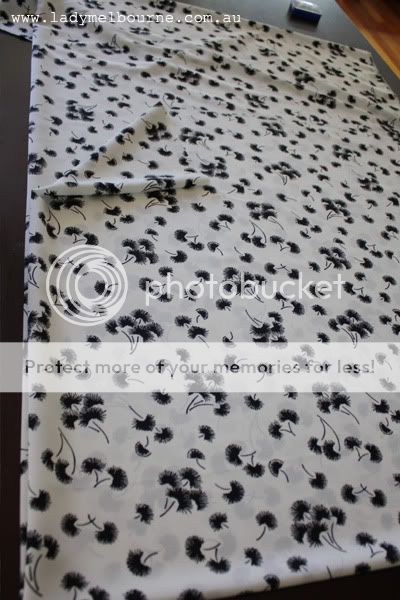
2. If you can sew then you may already know this, but Mother Melbourne taught me to shop in the furnishing section first, then to look at dress fabrics. You will find pure fabrics like cotton and linen with a wider meterage and generally cheaper. The fabric for this skirt that I made cost $10.95 a meter and I only needed half of that. The skirt cost $5.50.

3. Well, you already know this but shop second hand. And I don't mean vintage, I mean your true blue local op-shop or charity store. I found this on trend, cropped, linen blazer for $6 at Savers.

4. Customise clothes that you already own. I spotted a gal walking down Chapel St the other day with this super cute cardi with cream trim, in a sort of military twist.
Whilst at Spotlight buying my curtain/super cute skirt material I bought some grosgrain ribbon and sewed it onto a black cardi I already own. Cost: $6.95.


Share/Save/Bookmark